iOS

Introduction
The Airbrake iOS/Mac OS Notifier is designed to give developers instant notification of problems that occur in their apps. With just a few lines of code and a few extra files in your project, your app will automatically phone home whenever a crash or exception is encountered. These reports go straight to Airbrake where you can see information like backtrace, device type, app version, and more.
Installation
Directly from source code
- Drag the Airbrake folder to your project and make sure “Copy Items” and “Create Groups” are selected
- Add
SystemConfiguration.frameworkto your project - Add ‘CrashReporter.framework’ from Airbrake folder to your project
From cocoapods
Add this line:
pod 'Airbrake-iOS'
Upgrading
Please remove all of the resources used by the notifier from your project before upgrading. This is the best way to make sure all of the appropriate files are present and no extra files exist.
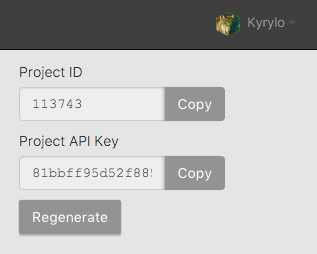
Find your project ID and project key
With version 4.x, Airbrake iOS also requires your Airbrake project ID. To find
your project_id and project_key navigate to your project’s General
Settings and copy the values from the right sidebar.
Running the notifier in Swift as framework
Add Airbrake-iOS to the podfile:
use_frameworks!
pod 'Airbrake-iOS'
import Airbrake_iOSin app delegate. (if you run into issue with build, please refer to issue #58)set up the ABNotifer in your app delegate at the beginning of your ‘func application(application: UIApplication!, didFinishLaunchingWithOptions launchOptions: NSDictionary!) -> Bool {’
ABNotifier.start(
  withAPIKey: YOUR_API_KEY,
  projectID: Your_Product_ID,
  environmentName: ABNotifierAutomaticEnvironment,
  useSSL: true
)
And you’re good to go.
Running the notifier in Swift as static library
When you add Airbrake iOS to your Swift project, Xcode will automatically add the bridging header for ‘ABNotifier’ class.
When Xcode didn’t generate the bridging header for your project, for example, you installed Airbrake iOS from cocoapods, you can create a bridge file manually.
Add a new file to the project and choose Header File as template
Next, Save as
[ProjectName]_Bridging_Header.hand make sure it’s at the root of the project.Open [ProjectName]-Bridging-Header.h and add ABNotifier, for example
#ifndef [ProjectName]_Bridging_Header
#define [ProjectName]_Bridging_Header
#import "ABNotifier.h"
#endif
Add
[ProjectName]_Bridging_Header.hto your project build settings. In your project build settings, find Swift Compiler – Code Generation, and next to Objective-C Bridging Header add your bridging header file. Now you should be able to access ABNotifier class in your swift project.
First, set up the ABNotifer in your app delegate at the beginning of your ‘func application(application: UIApplication!, didFinishLaunchingWithOptions launchOptions: NSDictionary!) -> Bool {’
     ABNotifier.start(
       withAPIKey: YOUR_API_KEY,
       projectID: Your_Product_ID,
       environmentName: ABNotifierAutomaticEnvironment,
       useSSL: true
     )
Running the notifier in Objective-C
The ABNotifier class is the primary class you will interact with while using
the notifier. All of its methods and properties, along with the
ABNotifierDelegate protocol are documented in their headers. Please read
through the header files for a complete reference of the library.
To run the notifier you only need to complete two steps. First, import the
ABNotifier header file in your app delegate.
#import "ABNotifier.h"
Next, call the start notifier method at the very beginning of your
application:didFinishLaunchingWithOptions:
[ABNotifier startNotifierWithAPIKey:@"YOUR_API_KEY"
                          projectID:@"Your_Product_ID"
                    environmentName:ABNotifierAutomaticEnvironment
                           delegate:self];
The API key argument expects your Airbrake project API key. The environment name you provide will be used to categorize received crash reports in the Airbrake web interface. The notifier provides several factory environment names that you are free to use.
- ABNotifierAutomaticEnvironment
- ABNotifierDevelopmentEnvironment
- ABNotifierAdHocEnvironment
- ABNotifierAppStoreEnvironment
- ABNotifierReleaseEnvironment
The ABNotifierAutomaticEnvironment environment will set the environment to
release or development depending on the presence of the DEBUG macro.
Configuration
Environment Variables
Airbrake notices support custom environment variables. To add your own values to
this part of the notice, use the “environmentValue” family of methods found in
ABNotifier.h.
Custom Exception Logging
You can log your own exceptions at any time.
@try {
    // something dangerous
}
@catch (NSException *e) {
    [ABNotifier logException:e];
}
When custom exception is used, the notifier will mirror the existing uncaught exception handler, and allow the application to catch and record exceptions without actually crashing.
Debugging
To test that the notifier is working inside your application, a simple test
method is provided. This method raises an exception, catches it, and reports it
as if a real crash happened. Add this code to your
application:didFinishLaunchingWithOptions: to test the notifier:
[ABNotifier writeTestNotice];
Similarly you can call the test method in Swift.
ABNotifier.writeTestNotice()
If you use the DEBUG macro to signify development builds the notifier will log
notices and errors to the console as they are reported to help see more details.
Implementing the Delegate Protocol
The ABNotifierDelegate protocol allows you to respond to actions going on
inside the notifier as well as provide runtime customizations. As of version 3.0
of the notifier, a matching set of notifications are posted to
NSNotificationCenter. All of the delegate methods in the ABNotifierDelegate
protocol are documented in ABNotifierDelegate.h. Here are just a few of those
methods:
MyAppDelegate.h
#import ABNotifier.h

@interface MyAppDelegate : NSObject <UIApplicationDelegate, ABNotifierDelegate>

// your properties and methods

@end
MyAppDelegate.m
@implementation MyAppDelegate

// your other methods

#pragma mark - notifier delegate

//  These are only a few of the delegate methods you can implement.
//  The rest are documented in ABNotifierDelegate.h. All of the
//  delegate methods are optional.

- (void)notifierWillDisplayAlert {
  [gameController pause];
}
- (void)notifierDidDismissAlert {
  [gameController resume];
}
- (NSString *)titleForNoticeAlert {
  return @"Oh Noes!";
}
- (NSString *)bodyForNoticeAlert {
  return @"MyApp has detected unreported crashes, would you like to send a report to the developer?";
}

@end
Signals
The notifier handles all unhandled exceptions, and a select list of Unix signals:
SIGABRTSIGBUSSIGFPESIGILLSIGSEGVSIGTRAP
Symbolication
In order for the call stack to be properly symbolicated at the time of a crash,
applications built with the notifier should not be stripped of their symbol
information at compile time. If these settings are not set as recommended,
frames from your binary will be displayed as hex return addresses instead of
readable strings. These hex return addresses can be symbolicated using
atos. More information about symbolication and these build settings can be
found in Apple’s developer documentation.
Here are the settings that control code stripping:
- Deployment Postprocessing: Off
- Strip Debug Symbols During Copy: Off
- Strip Linked Product: Off
Versioning
Airbrake supports a version floor for reported notices. A setting called “Latest
app version” is available in your project settings that lets you specify the
lowest app version for which crashes will be saved. This version is compared
using semantic versioning. The notifier uses your
CFBundleVersion to make this comparison. If you have apps in the wild that are
using an older notifier version and don’t report this bundle version, the
notices will dropped by Airbrake. For more information on how this is
implemented, read documentation article.
Supported versions
The notifier requires iOS 6.0 or higher for iOS projects and Mac OS 10.7 or higher for Mac OS projects. It’s also compitable with Swift. Current iOS Notifier version is 4.2.8.